Wednesday, August 31, 2011

7 Skirt Styles in 7 Days Wrap Up


Hooray! It's in the books and I'm thrilled to be able to share these seven basic styles of skirts with you. Thank you for checking in every day and for leaving all the wonderful feedback. Here are the links one more time; happy skirting!

Day 1: Circle Skirt with Tulle Ruffle
Day 2: Banded Panel Skirt
Day 3: Knit Yoga Skirt
Day 4: The Parlor Skirt
Day 5: Two Tiered Skirt
Day 6: Bubble Skirt
Day 7: The Carnival Skirt

Day7: The Carnival Skirt

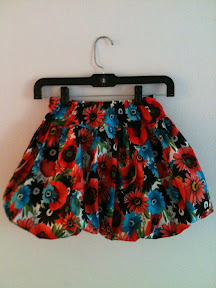
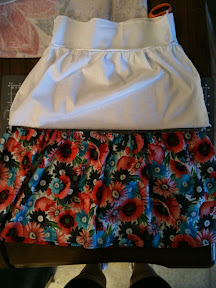
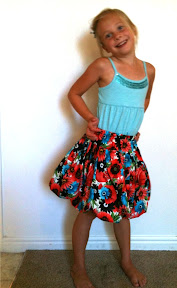
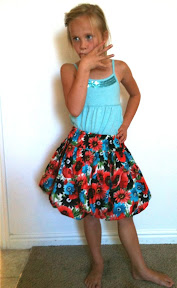
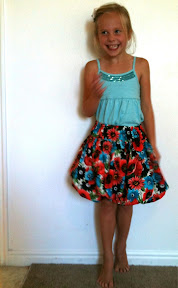
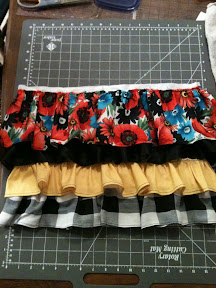
Hooray! Skirt 7 is finished and I think I finally pushed away the fate monster that put up a sturdy fight against my finishing this 7-day-turned-2-week challenge. I broke three needles in 30 minutes last night, but the results are awesome. This Carnival Skirt is among my favorites in the challenge.


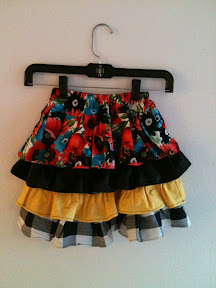
I had a hard time finding a name for this skirt. It's made of scraps, so I though about channeling Tim Gunn and calling it the "Make It Work" skirt. I figured that since the shape is so whimsical and the fabric possibilities are endless, it just seemed like a great piece to wear to a carnival. The wonderful thing about this skirt is you can make it from relatively little fabric if you're willing to get creative. There are many methods of making a ruffled skirt, including one that requires cutting strips of lining and sandwiching the ruffles between to enclose the seams, but since I'm offering simple skirts here this week, I'll show you a basic, easy way to achieve the same effect.

Supplies (for a size 5 girl's skirt)
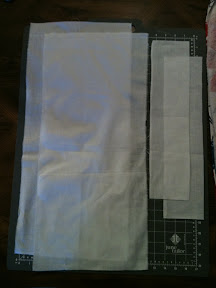
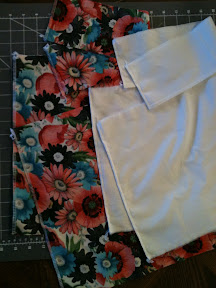
1/3 yard of lining fabric
1/4 yard of top ruffle/yoke fabric
1/8 yard each of 3 ruffle fabrics
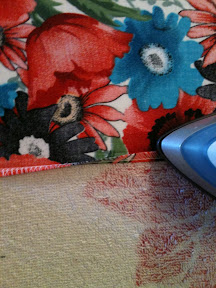
Thread to match (note: I used black thread on all of my fabrics because I like the contrast, but you may want to use matching thread on each ruffle)
1/2" wide elastic for waistband

Determine the desired finished measurements of your skirt. Mine were 14" long and 19" around the waist.

Make a yoke for your skirt by multiplying your waist measurement by 1.5 and divide it by 2. Since I hate math and try to keep calculations as simple as possible, I rounded my waist measurement up to 20, multiplied by 1.5 to get 30, and divided by 2 to get 15. You'll need two yoke pieces (that's why we divided by 2) that are 15" long and 3" wide. Place the two pieces right sides together and stitch the two short ends to make a wide tube.


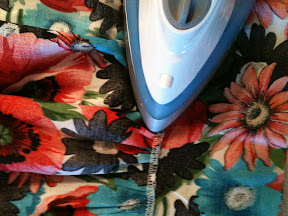
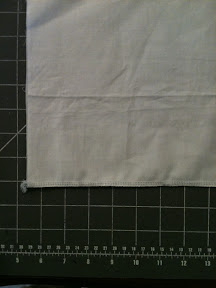
Serge or zig zag around one of the long edges of the yoke. Fold it over 5/8" and iron it down. Stitch the edge down to make a casing; go all the way around but leave about an inch unsewn so you can insert elastic later.


Next, make your lining. Cut two rectangles of lining fabric that are your waist measurement by length measurement minus 3". This made my rectangles 20x11". Follow the yoke steps to sew the lining pieces together.


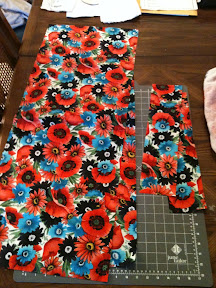
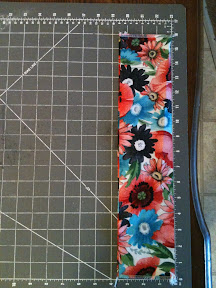
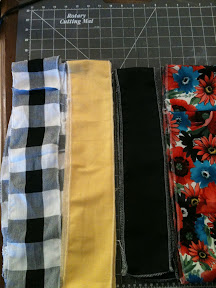
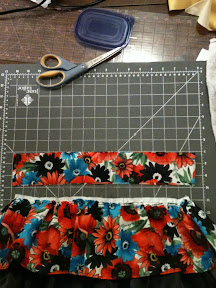
Now cut your ruffles. They should all have a length of 4 times your waist measurement. Cut the bottom ruffle 3.5" wide, the middle 2 ruffles 4" wide, and the top ruffle 6" wide.


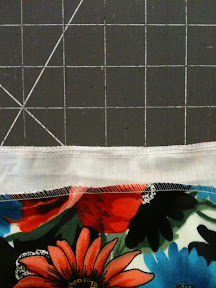
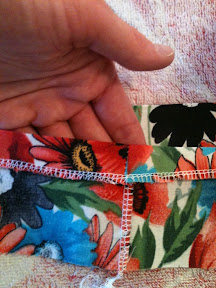
Now do the same thing to each of the ruffles that you did to the yoke and lining and you'll end up with four really wide, short tubes. Serge or zigzag around each of the long edges except the top edge of the wide ruffle (so yes, that's 7 really long rows of stitching...sorry!) to prevent fraying.


Now iron one of those edges up toward the inside of the fabric and stitch around it to hem. If you prefer to have a rolled hem, add 1/4" to the width of the ruffles when you cut and fold it twice in this step. Hem all four ruffles.


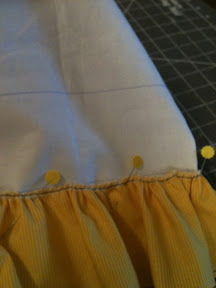
Sew a gathering stitch (set your machine to its longest stitch length and don't backstitch) all the way around the non-hemmed edge of your ruffles and the top edge of your lining. Leave some long tails when you cut it from your machine and pull the bobbin thread to gather all of the ruffles until they are the same width as your lining.


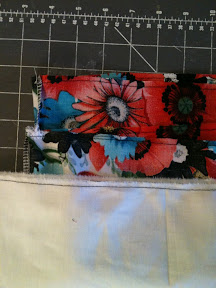
Take your bottom ruffle and slide it over the bottom of the lining. Flip the ruffle up so you can see the wrong side of the ruffle and the raw edge of the lining meets the top edge (now at the bottom) of the ruffle. Align the side seams of the lining with the side seams of the ruffle and pin in place. Now, remember our mantra from the bubble skirt tutorial? Right sides together, gathers on top? Well...use that process to sew this ruffle on as well. Stitch around the edge of the ruffle and lining. Then flip the ruffle back down and you'll have this:


Grab a ruler and a fabric pen with disappearing ink (or if you're like me, a plain old ball point pen...I'm ghetto). Measure up 2.5" from the seam where the bottom ruffle meets the lining and draw a line straight across. Measure up 2.5" from that line and draw another line, and finally, measure up 5" from the second line you drew. Flip the lining over and do the same thing to the other side so you have guidelines all the way around the lining.


You should have about an inch left above the top line and that is a good thing. We'll use that later.

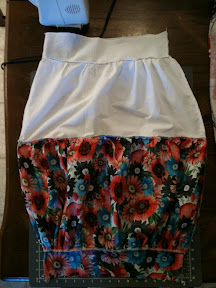
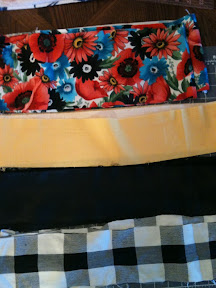
Pin your third (second-from-bottom) ruffle to the lining along the first line you drew. Be sure to line up the side seams like you did before. Don't flip this ruffle up, just topstitch the ruffle to the lining all the way around.


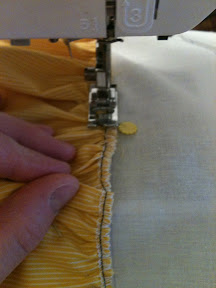
Proceed with the second and first ruffles the same way. Be sure your topstitching on the first ruffle isn't covering the gathering stitch at the top of the lining.


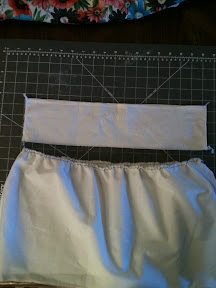
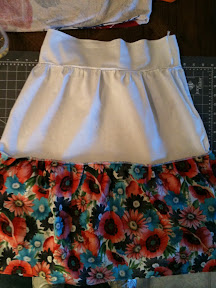
Now, gather the lining until it is equally as wide as the yoke you made earlier.


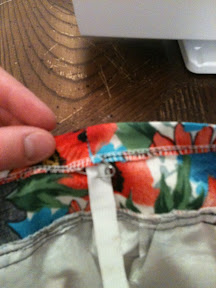
Turn the yoke inside out and slip it down over the top ruffle. Align the raw edges and pin, ensuring your seam will go over the gathered edge of your first ruffle. You'll have lining fabric sticking out beyond the seam, and that's okay. You can serge it off when you sew everything together or trim it off afterward.


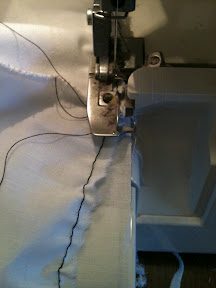
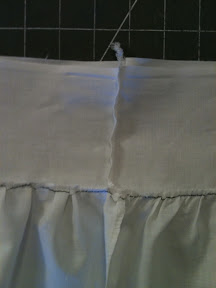
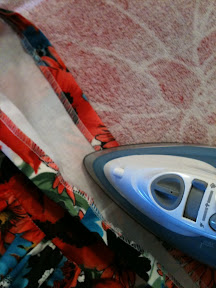
Sew all the way around this seam and clip threads. Flip the yoke up, turn the skirt inside out, and iron the seam allowance from the seam you just sewed up toward the waistband. Stitch around the skirt, using the seam from the top ruffle and lining as a guide for your presser foot.


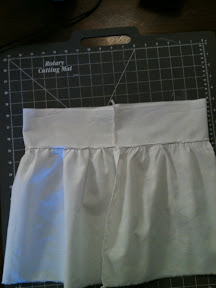
Sew about 1/4" from the seam and you'll get something that looks like this on the right side:


Cut your elastic 1 inch longer than your waist measurement and use a safety pin to thread your elastic into the casing.


Sew it together, 
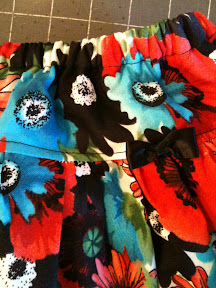
pull it in, and evenly distribute the fabric around the waistband. Stitch the casing shut, trim any excess thread hanging from the skirt, and give it a good shake to make the ruffles lie smoothly.


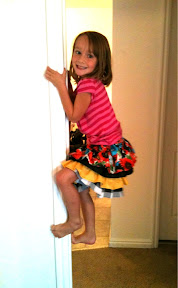
If you've got an adorable five-year-old with a quirky but awesome fashion sense (she chose the pink striped top) who loves to climb, throw the skirt on her and watch the magic happen. Chances are she'll be spinning and shaking her booty and dancing all over the place, and she will love the skirt so much that she won't take it off.


Thanks for checking in each day of my skirt challenge and for being patient these last two days, er, weeks. I'm already working on my next challenge and it's going to be a good one!

Monday, August 29, 2011

Day 6: Bubble Skirt

Better late than never, here is the sixth installment of the 7 Skirt Styles in 7 Days challenge. Be sure to check out Day 1, Day 2, Day 3, Day 4, and Day 5. I loved bubble skirts in the '80s, and unlike my affection for zippered ankles on jeans and slouch booties, my adoration for bubble skirts never disappeared. So get ready to rock a billowy and sassy getup (just...please...not with neon fishnets and hightop sneakers!).


Supplies:
1 yard of 45" wide cotton or cotton/poly fabric (top weights or light bottom weights work best)
1/2 yard 45" wide muslin or other woven lining fabric
Thread to match fabric
1/2" wide elastic
Ribbon or pre-made bow

Begin by determining the desired waist and length measurements of your finished skirt. My waist/length measurements were 20"/14 1/2".

To cut the yoke, multiply your waist measurement by 1.5 (that made mine 30"). Then divide that number by 2. Cut two rectangles from the skirt fabric that are this length (15" in my case) and 4" wide.

For the skirt portion, cut two rectangles that are twice your waist measurement (40") long and the length of your finished skirt (14 1/2").


Now cut the lining. Cut two rectangles with the same dimensions as your yoke fabric pieces and two rectangles that are 1.2 times your waist measurement (so mine was 24) and your finished length measurement minus 4" (10 1/2" for mine).


With right sides together, serge or zig zag the short sides of the yoke fabric together to make a loop of fabric. Repeat for the yoke lining, the skirt fabric, and the skirt lining.


Set your stitch to the longest length and sew a gathering stitch (don't backstitch) around one of the long edges of the skirt lining loop and both long edges of the skirt fabric loop.


Gather the skirt lining until it's the same width as the yoke lining.


Now repeat this mantra several times, because we're going to use it a lot during this process: "Right sides together, gathers on top. Right sides together, gathers on top." Good. Now, slip the gathered edge of the skirt lining into the yoke lining with, you've got it, right sides together. Line up the seams on each side, pin, and sew along that edge with...yes...gathers on top. Placing the gathers on top under your needle will prevent the feed dogs from ruining your gathers.

Another handy tip is to sew this seam with a regular machine first and then serge around it to prevent fraying. I learned the hard way that the blade on my serger frequently cuts through my gathering threads and leaves me with a stretched-out mess instead of a neatly-gathered ruffle. It adds a step, but it's totally worth the extra 2 minutes in the end.


You'll end up with this:


See how the seams line up?


That's what you want, and we'll use the same method of gathering, aligning side seams, pinning with right sides together, and sewing with gathers on top for the rest of the skirt. Now take the big loop of skirt fabric and gather one of the edges (this will become the bubble hem of the skirt) until it's the same width as the bottom of the skirt lining.


Repeat the mantra and the steps to sew it together.


Now, gather the other side of the fabric skirt until it's the same width as the yoke fabric loop.


Mantra time! Use it to sew the skirt to the yoke. You'll end up with a reversed hourglass shape of fabric: yoke lining, skirt lining, skirt, yoke.


Take the seam where the yoke meets the skirt and iron it toward the yoke.


Flip the skirt right side out, up and over the lining, and bring the top edges of the yoke and yoke lining together. Check the pull of the bubble at the bottom. It should billow nicely and no lining should be visible. Serge or zig zag around the top edges of the yoke and yoke lining, joining them together.


Topstitch around the outside of the skirt where the yoke meets the skirt. This is the seam you ironed previously, and if you align the presser foot with the outside seam, you'll catch the inner seam while you topstitch the skirt to the lining.


Fold the top edge of the skirt toward the inside 5/8" and iron flat to make a casing for the elastic waistband.


Stitch along the edge but don't go all the way around. Leave about 1" open. Cut your elastic to your waist measurement plus 1", thread it through the casing with a safety pin, and sew your elastic together. Pull the elastic into the casing and stitch it shut. Distribute the fabric around the waistband evenly.

If you want to add a bit of charm, sew a bow to the topstitching about 4" over from the side. I found these little gems in the $1 bin at Walmart, so I couldn't resist.


I just used my machine and sewed right down the middle a few times. Cute!


Now stand back and admire that '80s bubble glory which, in my opinion, seems to be working its way onto the timelessly classic list. I love that my cute daughter was thrilled when she saw this hanging in her closet. It made her first-tooth-lost day even better, and that made my day!


Adorable! Come back tomorrow for Day 7.

Tuesday, August 23, 2011

Fantastic Flapjacks

Thank you all for your loving sentiments regarding our loss of Grandpa Smith. His funeral took place yesterday and it was a glorious tribute to his amazing life. We have a peaceful feeling of love and comfort because we know Grandpa will always be watching over us and that we will see him again in the next stage of life.

Because of all the events of the past few days and because the challenge occurred in real time, I was only able to complete 5 of the 7 days in my skirt challenge. I really hate giving up, so I'll make the last two skirts later this week. Hopefully you've found some inspiration to make a fabulous skirt for yourself or he little lady in your life. I apologize for the interruption; I'm working on my bionic mom potion (I'll let you know once I've perfected the formula, he he), but i just couldn't keep everything on my plate warm. I hope you'll continue to check in because I really love creating things to share with you.

In the meantime, here's a great recipe for yummy and healthy whole wheat pancakes. They're awesome brain food (full of protein and fiber) and I'm planning to make lots of these now that school has begun.


Fantastic Flapjacks

1/2 cup plain Greek yogurt
3 eggs
3/4 cup plus 1 T skim milk
1 T pure vanilla
1 1/2 cups whole wheat flour
3 T sugar
1/2 t salt
2 t baking powder


Heat griddle to medium-high or 350 degrees F. Whisk yogurt and eggs together until smooth, then slowly whisk in milk and vanilla to avoid yogurt lumps. Add dry ingredients all at once and stir just to combine.


Spray or grease the griddle and pour scant 1/4 cupfuls onto it.


Cook until the edges are set, then flip. The pancakes will be a rich brown color and taste delicious.


Slather on some homemade freezer jam and you're sure to have an excellent day!


I'm linking here: